Travel Photography Ideas for Beginners
Traveling opens up a world of opportunities, not just to explore new places but also to capture the beauty and uniqueness of every location. Travel photography is an exciting way to document your journeys, share memories, and even tell stories about the people and places you encounter. For beginners, starting can feel overwhelming—cameras, settings, angles, lighting—it can all seem complicated. But don’t worry! Travel photography is about creativity, observation, and practice more than technical perfection. Here are some practical travel photography ideas for beginners to help you get started and improve your skills.
1. Embrace the Golden Hours
Lighting makes a huge difference in photography. For beginners, understanding the natural light around you can instantly improve your photos. The “golden hour”—the first hour after sunrise and the last hour before sunset—offers soft, warm, and flattering light. Buildings, landscapes, and even people look magical during this time. Avoid harsh midday sun, which creates strong shadows and overexposed areas.
Tip: Arrive early and plan your shots during these times to make your images look professional and vibrant.
2. Capture the Local Culture
Travel photography isn’t just about landscapes. It’s about experiencing and capturing the essence of a place. Look for local markets, street performers, festivals, or traditional clothing. These images tell stories that landscapes alone cannot. Candid shots of people engaged in everyday activities often create more compelling images than posed pictures.
Tip: Always ask permission before photographing someone up close. Respect and ethics in travel photography matter.
3. Use Leading Lines and Symmetry
Even beginners can make their shots look stunning by using simple composition techniques. Leading lines, such as roads, bridges, or rivers, guide the viewer’s eye toward the main subject. Symmetry—like a perfectly centered building or reflection—can create visually satisfying images. Observing patterns and lines in architecture, streets, or nature can add depth and interest to your photos.
Tip: Look for natural or man-made lines and try placing your subject at the end of the line to create focus.
4. Experiment with Perspectives
Most beginner photographers shoot from eye level, but experimenting with different angles can create a fresh perspective. Try taking photos from high vantage points, low to the ground, or through objects like windows or arches. This makes ordinary scenes look extraordinary. Perspective also helps you capture the scale of landscapes or architecture, showing just how grand or unique a location is.
Tip: Don’t be afraid to move around. Walk, squat, or climb safely to find new viewpoints.
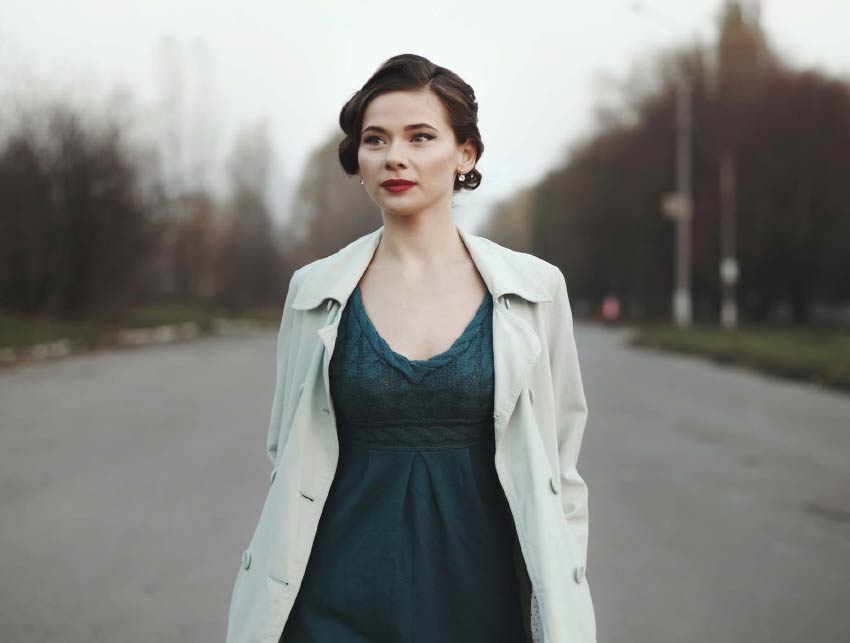
5. Include Human Elements
Adding a person to your travel photos can give a sense of scale, emotion, and storytelling. A lone traveler walking down a colorful street or someone sitting near a mountain view instantly draws attention. Even if you’re traveling alone, you can use your own shadow or a friend as the subject. This technique helps viewers connect with the image on a personal level.
Tip: Position the person off-center to make the composition more dynamic.
6. Focus on Details
Sometimes, the small things make the biggest impact. Don’t just aim for wide landscapes—capture details that tell a story about a place. This could be a close-up of local food, handcrafted items, textures of old walls, or patterns in nature. These details add depth and uniqueness to your travel photography portfolio.
Tip: Use a macro lens or smartphone camera’s close-up feature to highlight tiny details that others might miss.
7. Use the Rule of Thirds
The rule of thirds is a simple but powerful guideline in photography. Imagine dividing your frame into nine equal parts using two horizontal and two vertical lines. Placing your main subject along these lines or at their intersections creates balance and a more pleasing composition. Beginners often center their subjects, which can make images feel flat.
Tip: Many cameras and smartphones have a grid feature—turn it on to practice this technique.
8. Capture Movement and Action
Static photos are beautiful, but action shots can tell exciting stories. Capture movement like waves crashing, people dancing, or birds in flight. You can use a slower shutter speed to create a motion blur effect, adding a sense of dynamism. Alternatively, freeze action with a faster shutter speed to capture a sharp moment in time.
Tip: Observe the scene for a few moments and anticipate interesting movements to click at the perfect moment.
9. Tell a Story
Travel photography is more than just taking pretty pictures—it’s about telling stories. Think about what story you want to convey: adventure, culture, tranquility, or excitement. A single photo can reflect a journey, emotions, or experiences. Series of photos can even document an entire day in a particular place, creating a visual storybook of your travels.
Tip: Plan shots around a theme or narrative to make your travel album more engaging.
10. Don’t Forget Post-Processing
Editing is a part of photography. Beginners often feel intimidated by editing tools, but simple adjustments can dramatically improve your images. Adjust brightness, contrast, and saturation to bring your photos to life. Apps like Lightroom, Snapseed, or even Instagram’s built-in editor are beginner-friendly. However, avoid over-editing—keep your photos natural and true to the moment.
Tip: Learn basic editing techniques gradually; small changes often make the biggest difference.
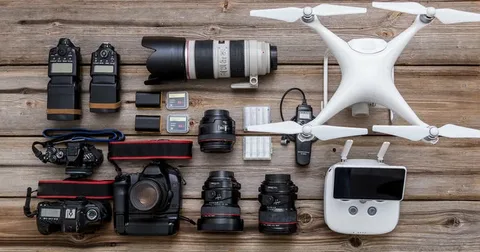
11. Carry the Right Gear
You don’t need expensive cameras to start. Many beginners take amazing travel photos with smartphones. If you have a camera, a lightweight DSLR or mirrorless camera is ideal. Carry a small tripod for stable shots and a travel-friendly lens for versatility. Minimal gear is better for beginners because it allows you to focus on creativity rather than technical complications.
Tip: Keep your gear accessible; spontaneous moments often make the best photos.
12. Practice Patience
Sometimes, the best travel photos come after waiting. Whether it’s a street performer finishing a move, the sun appearing behind clouds, or a rare animal appearing, patience is key. Don’t rush shots—take your time to observe, frame, and capture the perfect moment.
Tip: Enjoy the experience as much as the photography. Sometimes the best memories are the ones behind the camera.
FAQs About Travel Photography for Beginners
1. Do I need an expensive camera for travel photography?
No, beginners can start with a smartphone or a basic camera. Creativity and observation matter more than gear.
2. How can I capture local people without offending them?
Always ask for permission before photographing someone, and be respectful of cultural norms.
3. What is the golden hour in photography?
The golden hour is the first hour after sunrise and the last hour before sunset when natural light is soft and warm.
4. How do I make my travel photos more interesting?
Experiment with angles, include people or objects, focus on details, and use composition rules like the rule of thirds.
5. Can I edit my travel photos on a smartphone?
Yes! Apps like Lightroom, Snapseed, and Instagram allow you to adjust lighting, colors, and sharpness easily.
Conclusion
Travel photography for beginners is all about curiosity, observation, and experimentation. You don’t need to be a professional to capture stunning images—just a willingness to explore, a keen eye for details, and patience to frame the perfect shot. By focusing on lighting, composition, storytelling, and creativity, even simple photos can tell incredible stories. Remember, every trip is an opportunity to create memories and practice your skills. The more you practice, the better your photography will become, and soon you’ll have a portfolio of images that truly reflect the beauty and diversity of the world around you.
Related Posts
Latest Collection
Recent Works